Did you see the Hearts of Elegance Pop Up Card that I made yesterday?? Everyone loved it, so I HAD to make another one! They’re just SO much fun!! Whoever gets these cards will adore them…I promise!!
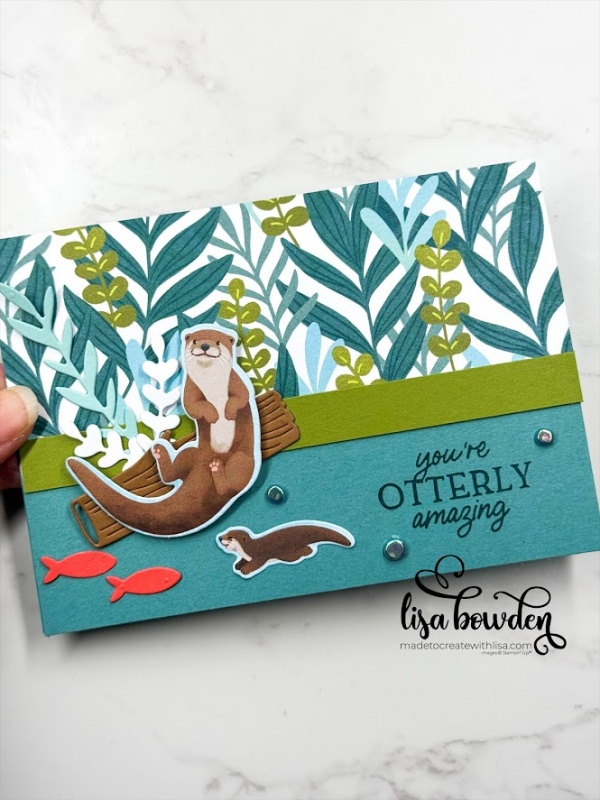
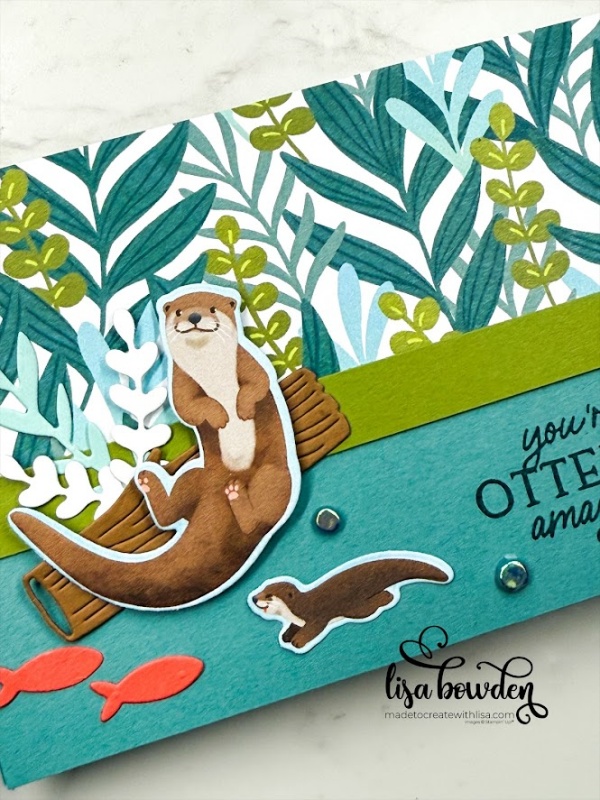
Today’s card uses the Otterly Awesome bundle by Stampin’ Up!, which includes the stamp set, coordinating dies, and adorable Designer Series Paper. I cut out the otters directly from the paper, instead of stamping and coloring them myself, which is such an easy way to make cute projects!
PLEASE CLICK HERE to watch the video where I made this card. It REALLY helps to watch the video when you’re trying to figure out how to make it!
I started out with 2 pieces of Lost Lagoon cardstock, each measuring 4-1/4″ x 5-1/2″. Both of these pieces are scored at 3/8″ when you have the short side facing up on your Paper Trimmer.
Now, turn one piece horizontally, so that the score line is at the TOP. Adhere a piece of the DSP to the top of the card (directly beneath the score line), measuring 2-1/2″ x 5-1/2″. Now, layer a small strip of Old Olive cardstock on top of that, measuring 1/2″ x 5-1/2″. Stamp the sentiment, from the Otterly Awesome stamp set, onto the card front as pictured, using Pretty Peacock ink. Finally, die cut out some of the darling images from the matching die set, such as the seaweed, leaves, and fish, using Pool Party, Basic White, Pecan Pie, and Flirty Flamingo cardstocks, and adhere them onto the card front using Liquid Glue. The otters, both the big one and the small one, were cut out directly from one of the sheets of DSP. They’re SO cute!
After decorating the front of the card, fold along the score line at the top of the card, and add Tear & Tape adhesive to it (on the front side, right above the DSP). Peel off the adhesive protector, and you’re ready to add the otters on the inside of the card.
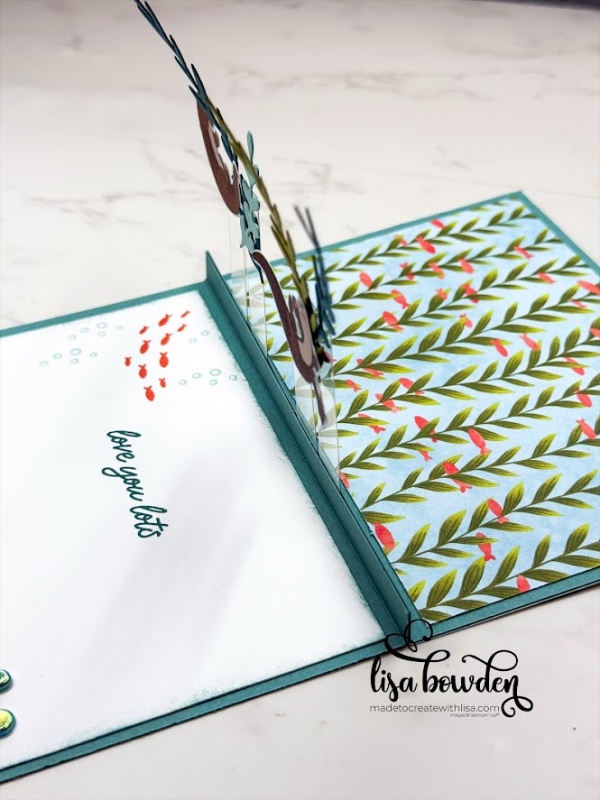
I used Window Sheets (acetate) for these pop-up otters & seaweed, which worked perfectly. I cut myself 4 strips of acetate, measuring 1/2″ x approximately 4″ (they will be all different lengths in the end, so the length doesn’t exactly matter). Using Mini Glue Dots, adhere the die cut items to the acetate strips (you can see how to do this in the video here), and then lay the strips onto the top of the card where the Tear & Tape adhesive is. I put everything at all different lengths, which looks really great.
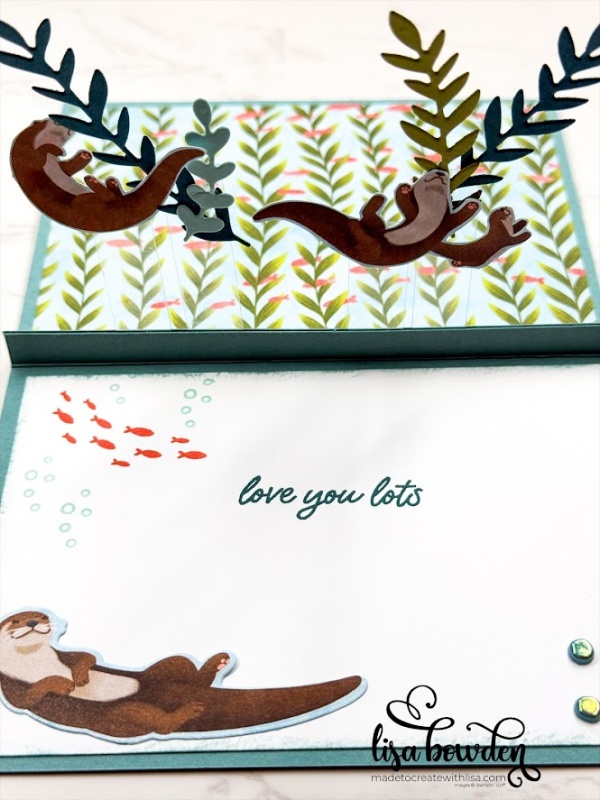
Now, fold the other piece of Lost Lagoon cardstock along its score line, adding Tear & Tape adhesive to it as well, and “butt” the ends up against each other. Now, the ends of the acetate strips are enclosed into the middle of the card, and the otters and seaweed “pop up” when you open the card! Isn’t that SO cute!!
I decorated the inside of the card using another sentiment from the stamp set, using Pretty Peacock ink again, and also added the school of fish (Flirty Flamingo ink), and the bubbles (Pool Party ink). I also used a blending brush to add Lost Lagoon ink to the outer edge of this piece of Basic White cardstock, to give it more of an “under the water” look instead of just stark white edges. The final touch was sprinkling on some of the really pretty Riverside Irregular Pearls, which tied everything together.
Product List")
 Designer Series Paper")


love this card! joybart25@gmail.com
Thank you so much, Joyce! I’m so glad you like it…these otters were super fun to create with!! I hope you give it a try!