I am totally in the mood to think about sunshine and bright, Spring days! Are you with me?? I love the sunshine, and I can’t wait for Spring to arrive. So, in the meantime, I’ll start making card projects with flowers and light, springy colors!
I also love easy Fun Fold cards. Something that looks a little different than the “regular” card fold, yet something that is totally easy to make. That’s what we have here in today’s card! A quick and easy fun fold card layout.

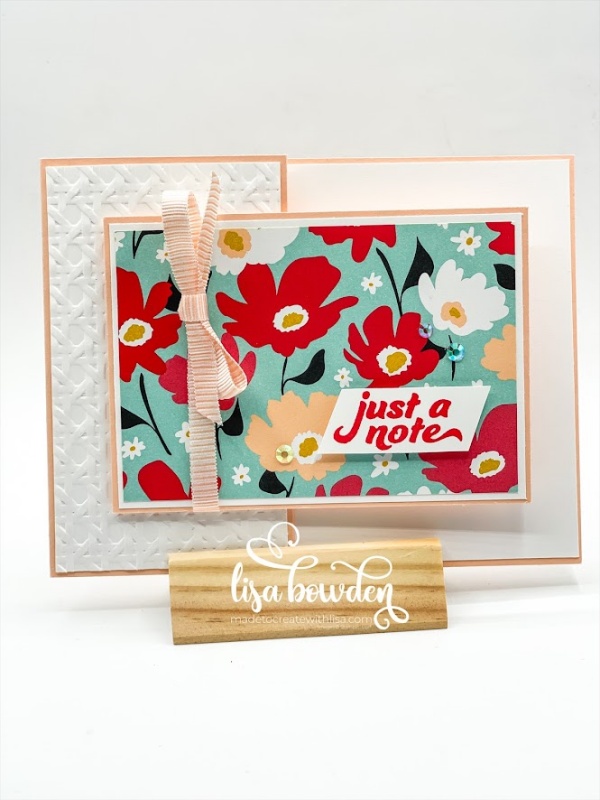
I started out with a Petal Pink cardstock base, measuring 4-1/4″ x 11″, scored at 5-1/2″. Next, I cut off 3″ from one side of the cardstock, so that the card front was “shorter” than the back. Don’t throw this 3″ piece away! We will use it for the card front. PLEASE CLICK HERE to watch the video where I made this card. You’ll be able to see exactly what I’m trying to describe here!
Next, I layered a piece of Basic White cardstock onto the small card front, and I used the Cane 3D Embossing Folder to give it some depth and interest. This part of the card was not on my video, because I thought of it later. But I really think it adds the perfect touch. This piece of Basic White cardstock measures 2-3/8″ x 4-1/8″.

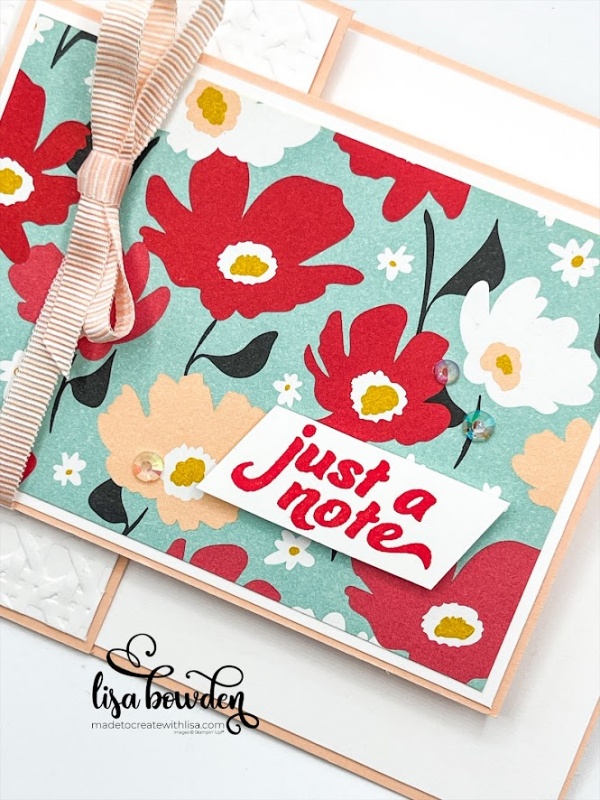
I took the 3″ piece of Petal Pink cardstock that I had cut off of the card front, and used it to layer up for my main focal piece on the front of the card. I layered a piece of Basic White cardstock onto it, measuring 4-1/8″ x 2-7/8″. Finally, I layered on a piece of the adorable floral print from the Sunny Days Designer Series Paper (DSP) pack, which is one of my favorites! It’s such a bright and cheerful print, it makes me smile. This piece measures 4″ x 2-3/4″.
Before adhering this onto the card base, I wrapped a piece of ribbon around it, and tied it in a bow. This is the Petal Pink striped ribbon from the Ribbon Due Combo Pack, and it matched this card perfectly. Then, I adhered this entire piece onto the little card front, using Stampin’ Dimensionals.
For the sentiment, I used the Filled with Happiness stamp set. I stamped it with Poppy Parade ink onto Basic White cardstock, and then cut out only the “Just for You” from the image. I love being able to customize our sentiments by cutting them up! I layered this onto the card using Stampin’ Dimensionals.

Finally, I sprinkled on a few of the Iridescent Rhinestone Basic Jewels, which gave a little sparkle.
This card layout is such a good one to have in your repertoire! I hope you’ll give it a try!
Product List


Your cards are beautiful!!
Awe, thank you so much!! You are so kind!