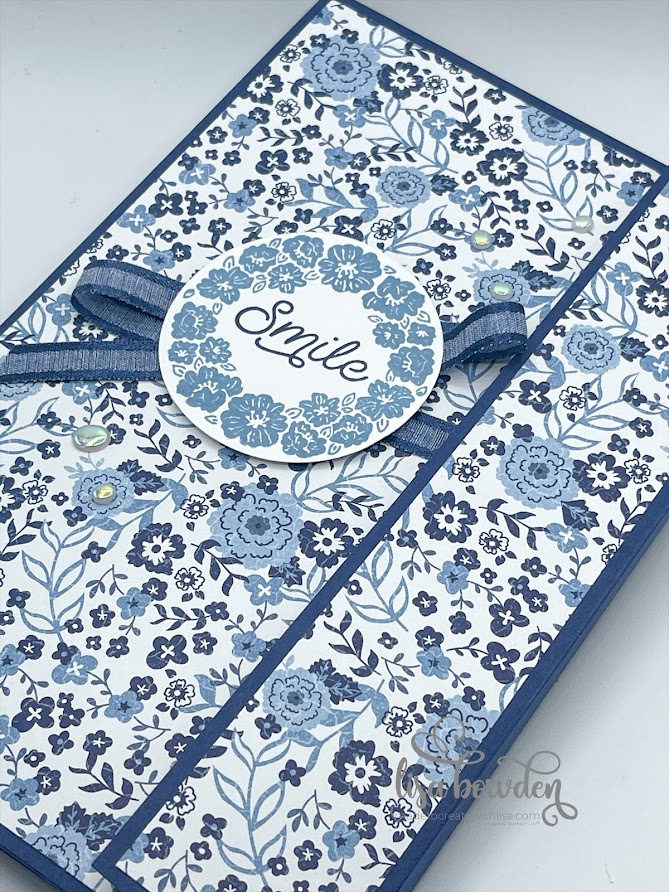
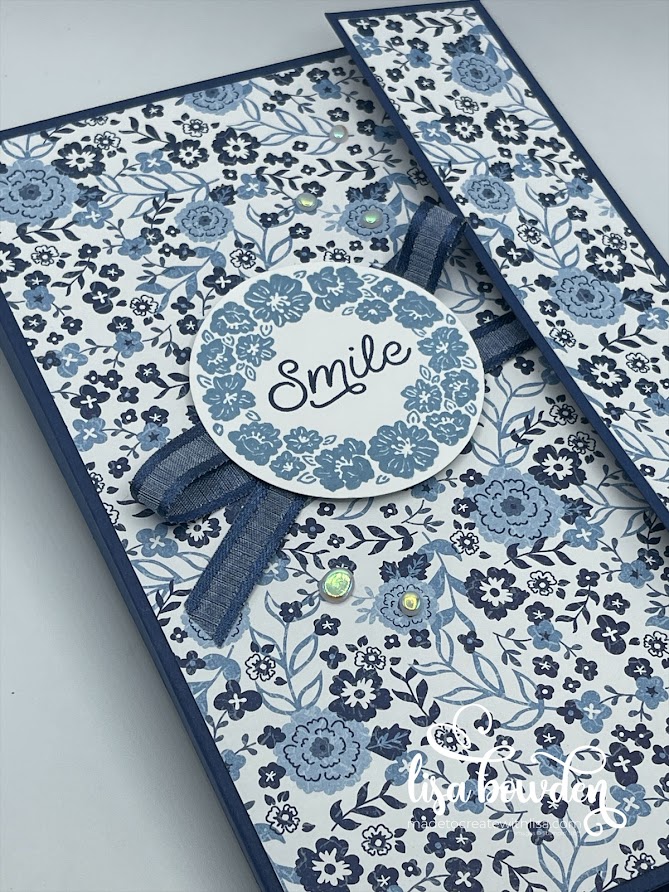
I have been so excited to share with you this little notebook, and today’s the day! I attended a retreat in Kentucky in April, and I made 80 of these babies to add to everyone’s swag bags. I was able to use up lots of my retired cardstock and beautiful Designer Series Paper, and although it was a lot of work, it really was lots of fun! Now, I’m thinking that I need to make some for upcoming gifts. I already have a friend who wants me to help her make a big pile for Christmas gifts for her friends this year! We’d better get to work!

It would really help for you to watch the video where I made this notebook, in order to get a general idea of how it’s made. This will help you see exactly how it all folds together once it’s scored and folded. I will give you the exact measurements here, but it will be easiest for you to truly see the step-by-step by watching the video.
Here are the measurements:
Night of Navy Cardstock (2 pieces)
- 5-⅞” x 11”, scored on the short side at 5-½”, and scored on the long side at 2-¾”
- 8” x 11”, scored on the short side at ⅜”, 5-⅞”, 6-¼”, and scored on the long side at 2-¾”
Designer Series Paper (Countryside Inn paper used here)
- 5-¼” x 8”
- 1-½” x 8”
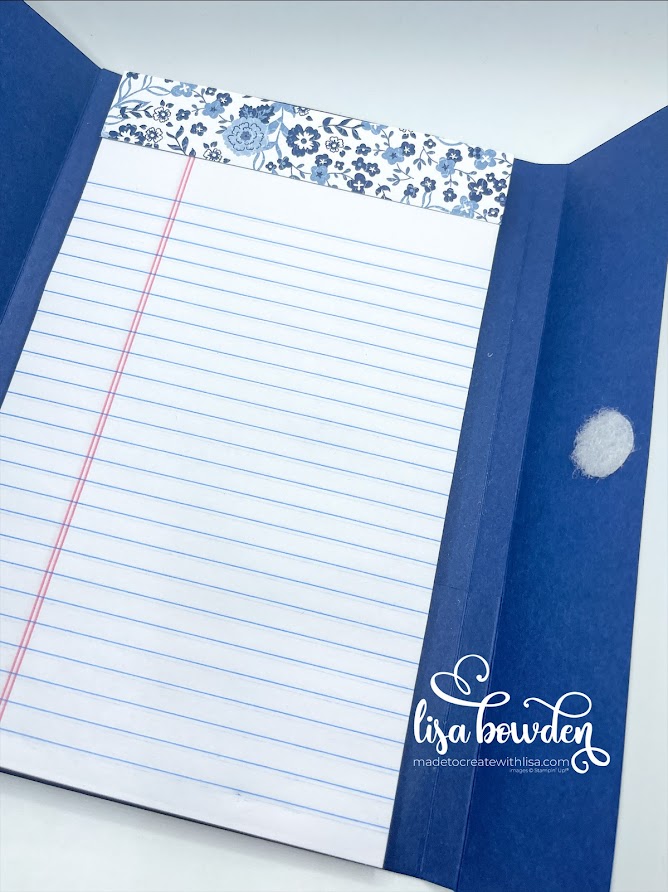
- 1” x 5” (top decoration for the pad of paper)
First, fold your paper on all of the score lines. In the video, you’ll see the area of the 8” x 11” piece that needs to be cut off, since you don’t need this section. Be sure to cut that part off now, before moving on.

Next, using your Tear & Tape, adhere the 2 pieces of cardstock together. Be sure to really burnish this well, so that the adhesive really sticks! We don’t want these notebooks falling apart!
After the 2 pieces are stuck together, fold the pocket portion up and adhere this also using Tear & Tape adhesive. The notebook sits inside of this pocket,so this step is very important! Here is my Amazon Affiliate link for the notebooks I used for this project. They worked perfectly, and were the exact size I needed for this project!

After the cardstock “book” is finished, adhere the Designer Series Paper to the various flaps of the notebook. All of this is shown in the video. You can see exactly where each piece needs to be adhered.
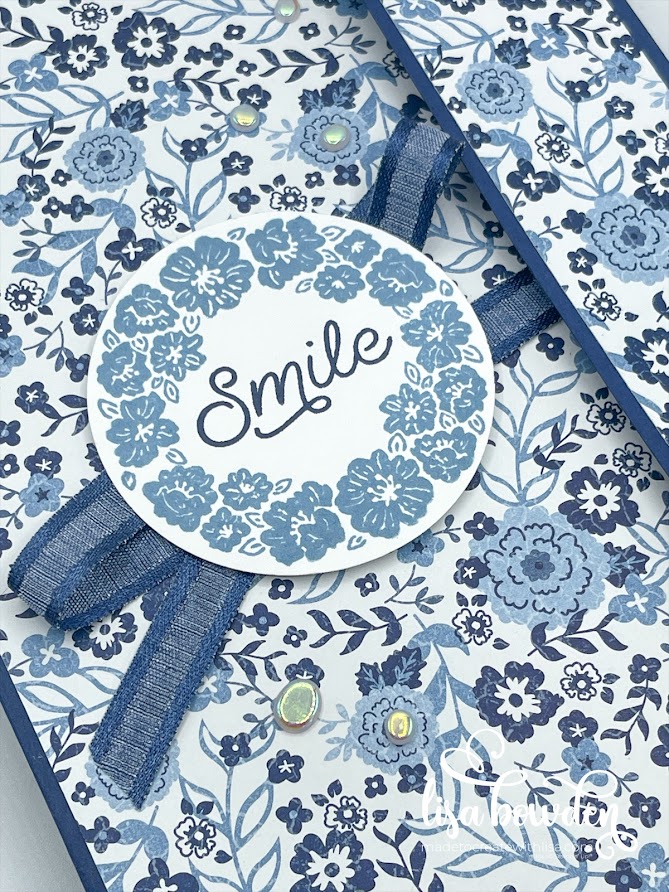
Finally, you can decorate the front part of your notebook however you’d like! I chose to use the new Circle Sayings stamp bundle, which includes the new 2-⅜” circle punch. I used Boho Blue and Night of Navy ink to stamp the flowers and the sentiment, and then layered this onto my notebook, right on top of a ribbon accent. I used the Night of Navy ⅜” Bordered Ribbon, which matches this Designer Series Paper perfectly!
The last accent I added was some of the Flat Adhesive-Backed pearls. I love these pearls, because not only are they iridescent and shiny, but they are flat!

After everything is finished, you need to close your notebook. I chose to use Velcro adhesive dots, and here is my Amazon affiliate link for the ones that I purchased. When I made these for my retreat, I used little magnets instead of Velcro dots. I found that the cardstock pulled apart too easily for the little magnets, so I decided that Velcro dots were a much better choice.

I hope you will make a few of these yourself! And, maybe a big pile of them for gifts this year! Enjoy the inspiration, and have fun!
If you loved this project, I hope you’ll check out the other card I made using this same Designer Series Paper. I loved how it turned out!
Product List


This is an amazing project. I just started following your page. I have a demonstrator. I’m sorry but I really like this. I’d really like to make a couple of these. This is a really great gift. Thanks for sharing this with all of us. And I can’t wait to see how else you inspire me
This blesses my heart! Thank you for your sweet compliments. You made my day!
Thank you for sharing this great idea! Love it!
Thank you so much! I’m so glad you like it!
Love your Notebook. Thank you for sharing
I’m so glad you like it, Sharon! I hope you give it a try!
Love this notebook! Having trouble making it. I haven’t found full video only short video.
Thank you so much, Mary! I hope you make lots of them! Here is the direct link: https://youtu.be/wT4gXvpoRUk
Hi Mary! I’m so sorry I am just now seeing this comment! Here is the direct link to the full YouTube video on my channel. I hope it helps!
https://youtu.be/wT4gXvpoRUk
I just made one of these with a matching card made on the vertical so it can slip into the pocket leaving the entire front exposed. I see so many possibilities for this project. Thank you so much for sharing.
How neat!! I’m sure it was beautiful.
Lisa..just started following you, I am confused on the measurements do you start out with two pieces of cardstock measuring 8 1/2 by 11 and then cut each one down to 5 3,/8 by ll and then score each one…sorry to be so stupid, but 73 years sometimes hard to understand….
Hi Carol! Have you watched the long video where I made this? It helps to visually see how the paper is laid out when you’re putting it all together. Yes, you start with 2 pieces of regular 8-1/2″ x 11″ cardstock, but you cut them down. One piece is one measurement, and the other piece is a different measurement. You score each piece differently. Here is what it says on the blog post:
Night of Navy Cardstock (2 pieces)
5-⅞” x 11”, scored on the short side at 5-½”, and scored on the long side at 2-¾”
8” x 11”, scored on the short side at ⅜”, 5-⅞”, 6-¼”, and scored on the long side at 2-¾”
Designer Series Paper (Countryside Inn paper used here)
5-¼” x 8”
1-½” x 8”
1” x 5” (top decoration for the pad of paper)
Hope this helps!
I use milk cartons for mine
Wow! I’ve never heard of that! Very cool!
Im old and slow too😂 I can’t seem to make the measurements work either. Am I the only one?
I’m sorry it’s difficult for you! Try using some scrap paper work first, so that you don’t waste any cardstock. It works perfectly, if you follow all of the score and cut lines!
I’ve tried several and im missing something somewhere but thanks for getting back to me.