
It’s time for the June Creativity Abounds Blog Hop! We are a group of Stampin’ Up! Demonstrators from all around the world who are here to share our creative ideas with you. We hope to inspire you this month with tons of different MASCULINE cards! You may be starting here, or you may have come from someone else’s blog. Either way, there is a list at the end of this post to help you “hop” to all the different blogs and get many amazing ideas. We all have our countries listed, so if you are looking for a demonstrator in your country, we would love to help you with your Stampin’ Up! shopping or if you would like to join our Stampin’ Up! teams!
This month’s theme is MASCULINE cards, and I’m really excited about the HUGE tutorial that you can buy as an instant download in my Made to Create store! I know you’re going to love it. Those of you who have made a $35+ purchase (before tax & shipping) through my Stampin’ Up! website in the month of June will also receive a copy of this awesome tutorial for FREE!
For today’s blog post, I made a beautiful Fun Fold card using the Loveliest Tree stamp set. I also featured a really neat technique, and I’m excited to show you!
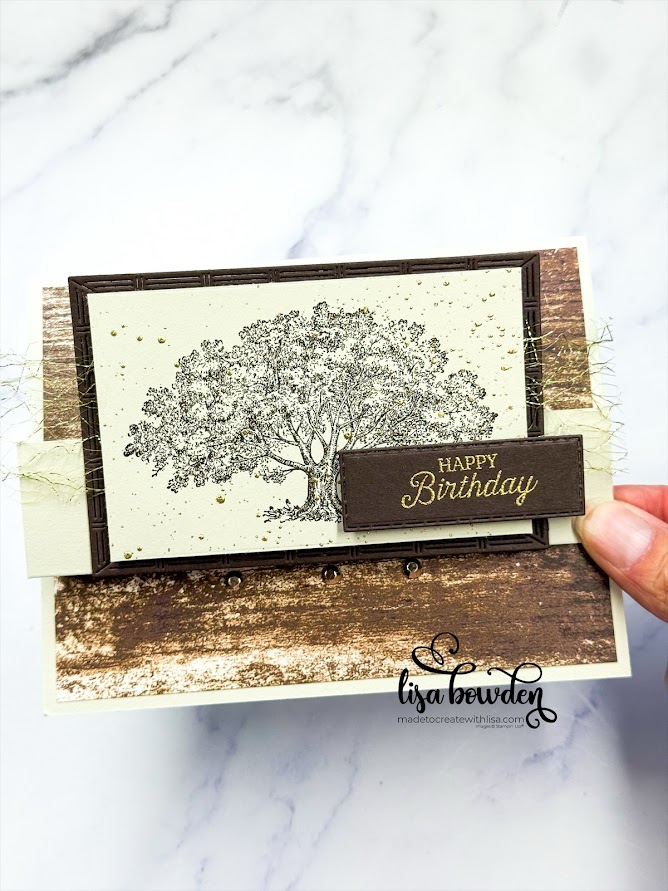
To make the card base, I started out with a 5-1/2″ x 8-1/2″ piece of Basic Beige cardstock, scored at 4-1/4″ and 7-1/4″. PLEASE CLICK HERE to watch exactly how to fold this card base and put the card together.
Next, I layered my pieces of Country Woods Designer Series Paper onto the card base. I cut several pieces from the same woodgrain print. The piece on the card front (top), as well as the piece that goes inside the middle section of the card, both measure 2-3/4″ x 5-1/4″. Cut 2 of these, and adhere them where they go.
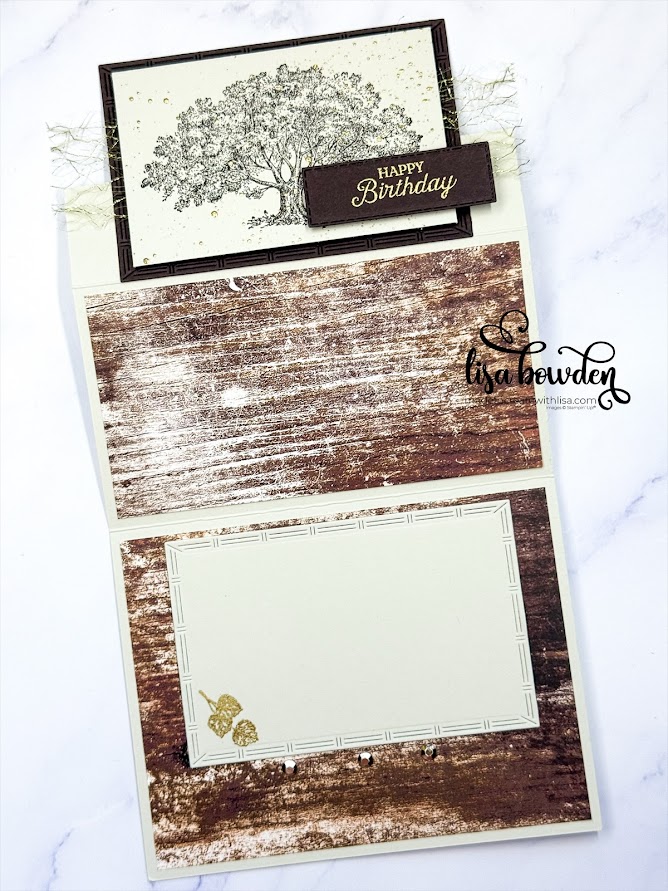
The inside/back portion of the card is another piece of DSP, and this piece measures 4″ x 5-1/4″. By now, you have cut and adhered 3 pieces of the DSP to the card.
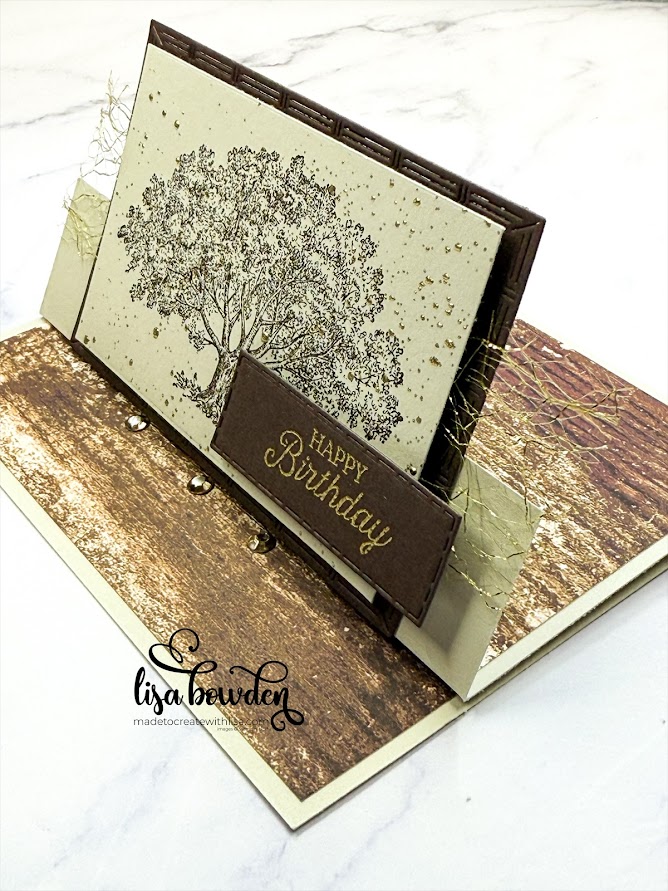
For the front folded “flap” of the card, I adhered an Early Espresso piece that I die cut out using the Textured Notes dies. These dies are AMAZING!! I use them SO much…they’re a great layering piece like I’m using today. For this piece, I die cut out the 3rd from the largest rectangle, and glued it to the front flap of the card using Stampin’ Seal.
For this part, I hope you will watch the video so you can see how it’s done! I cut myself a piece of Basic Beige cardstock that will layer on top of the Early Espresso die cut. This piece measures 3-7/8″ x 2-1/2″. I stamped the tree from the Loveliest Tree stamp set onto the piece, using Early Espresso ink. Next, I made myself a “paste” from some Liquid Glue, mixed with a tiny bit of water, and used a water pen to “spritz” little blobs of glue all over my paper!! It looks so cool! I sprinkled on my Gold WOW Embossing Powder onto the glue dots, and heat embossed them using my Heat Tool. It looks AMAZING!!!
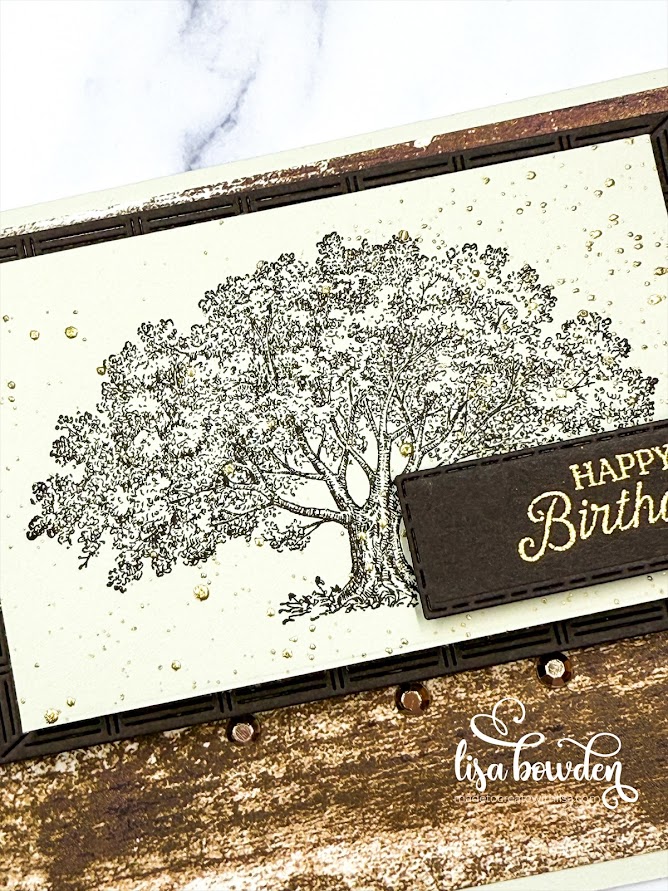
I heat embossed the sentiment onto the smallest Textured Notes die that I cut out of Early Espresso cardstock, using the same Gold WOW Embossing Powder, and added this to the stamped Tree piece using Stampin’ Dimensionals. Before I layered this all onto the card front, I laid down a piece of the Gold Open Weave Trim, measuring approximately 5-1/2″. Then the stamped Tree piece layered on top of this with Stampin’ Dimensionals.
Finally, I die cut out the same Textured Notes die, this time from Basic Beige cardstock, for the inside of my card. I heat embossed the little leaf stamp onto the corner, and it looks perfect. Be careful to adhere this piece up high enough, so that you can’t see it when the card is closed.
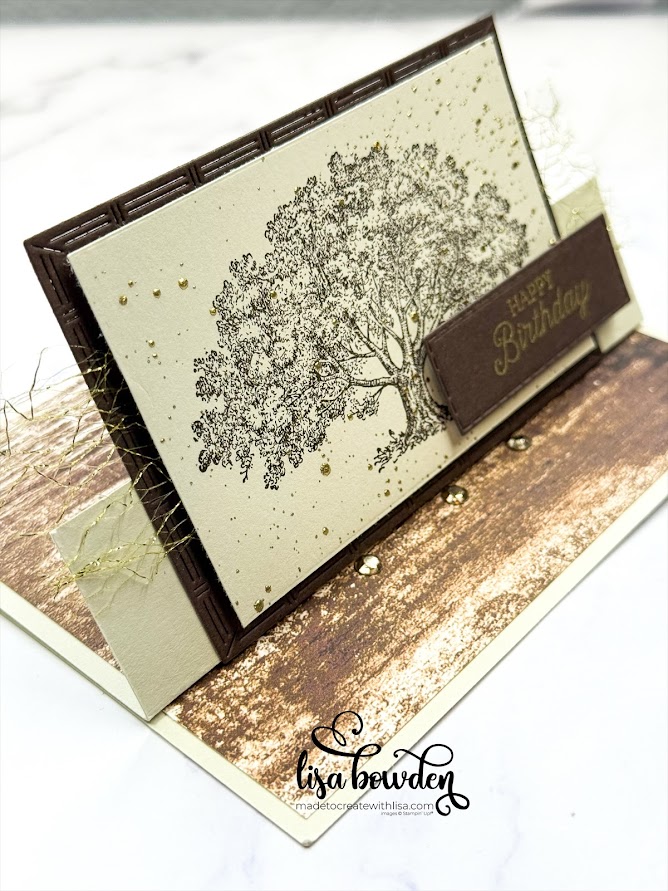
The finishing touch was sprinkling on a few of the Metallic Gems, I placed them all in a row so that the card kind-of uses them as an “easel,” to help prop it up. And voila! This card is officially done!
I would love for you to grab June’s Creativity Abounds Tutorial Pack! Click here to purchase, in my Made to Create store, and it’s an instant download FULL of 13 different MASCULINE CARD IDEAS that you’re going to love. Here is the Sneak Peek for the projects that are featured in June’s Creativity Abounds Tutorial:
Have fun hopping to everyone else’s blogs! I hope you gain some inspiration that you can add into your everyday crafting! Please let me know if you have any questions.
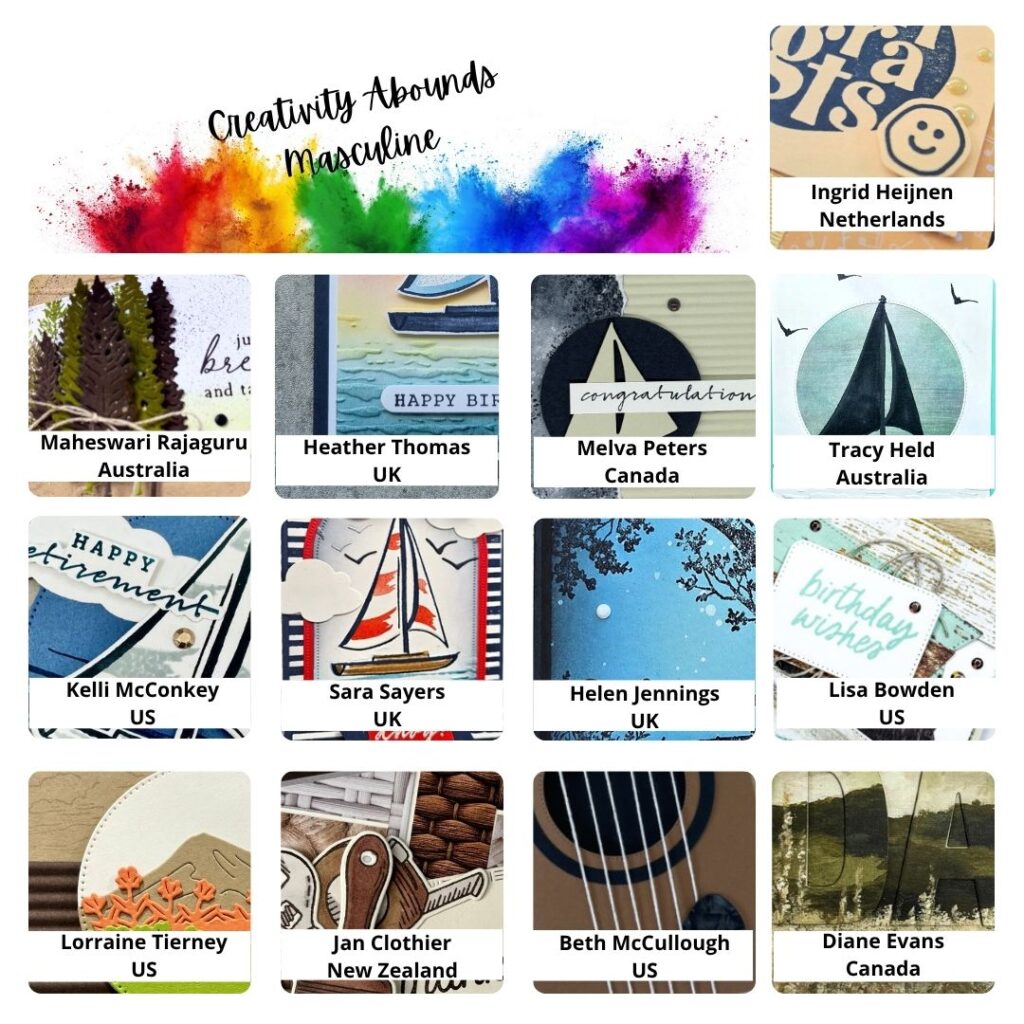
Here is our amazing Creativity Abounds Design Team:

![Loveliest Tree Cling Stamp Set (English) [ 163714 ]](https://assets1.tamsnetwork.com/images/EC042017NF/163714s.jpg "Loveliest Tree Cling Stamp Set (English) [ 163714 ]")
![Textured Notes Dies [ 165555 ]](https://assets1.tamsnetwork.com/images/EC042017NF/165555s.jpg "Textured Notes Dies [ 165555 ]")
![Basic Beige 8 1/2" X 11" Cardstock [ 164511 ]](https://assets1.tamsnetwork.com/images/EC042017NF/164511s.jpg "Basic Beige 8 1/2\" X 11\" Cardstock [ 164511 ]")
![Early Espresso 8-1/2" X 11" Cardstock [ 119686 ]](https://assets1.tamsnetwork.com/images/EC042017NF/119686s.jpg "Early Espresso 8-1/2\" X 11\" Cardstock [ 119686 ]")
![Early Espresso Classic Stampin' Pad [ 147114 ]](https://assets1.tamsnetwork.com/images/EC042017NF/147114s.jpg "Early Espresso Classic Stampin' Pad [ 147114 ]")
![Versamark Pad [ 102283 ]](https://assets1.tamsnetwork.com/images/EC042017NF/102283s.jpg "Versamark Pad [ 102283 ]")
![Multipurpose Liquid Glue [ 110755 ]](https://assets1.tamsnetwork.com/images/EC042017NF/110755s.jpg "Multipurpose Liquid Glue [ 110755 ]")
![Gold 1 1/2" (3.8 Cm) Open Weave Trim [ 165715 ]](https://assets1.tamsnetwork.com/images/EC042017NF/165715s.jpg "Gold 1 1/2\" (3.8 Cm) Open Weave Trim [ 165715 ]")
![Metallics Wow! Embossing Powder [ 165678 ]](https://assets1.tamsnetwork.com/images/EC042017NF/165678s.jpg "Metallics Wow! Embossing Powder [ 165678 ]")
![Heat Tool (Us And Canada) [ 129053 ]](https://assets1.tamsnetwork.com/images/EC042017NF/129053s.jpg "Heat Tool (Us And Canada) [ 129053 ]")
![Adhesive Backed Metallic Gems [ 163780 ]](https://assets1.tamsnetwork.com/images/EC042017NF/163780s.jpg "Adhesive Backed Metallic Gems [ 163780 ]")
![Paper Trimmer [ 152392 ]](https://assets1.tamsnetwork.com/images/EC042017NF/152392s.jpg "Paper Trimmer [ 152392 ]")
![Stampin' Cut & Emboss Machine [ 149653 ]](https://assets1.tamsnetwork.com/images/EC042017NF/149653s.jpg "Stampin' Cut & Emboss Machine [ 149653 ]")

Leave a Reply