
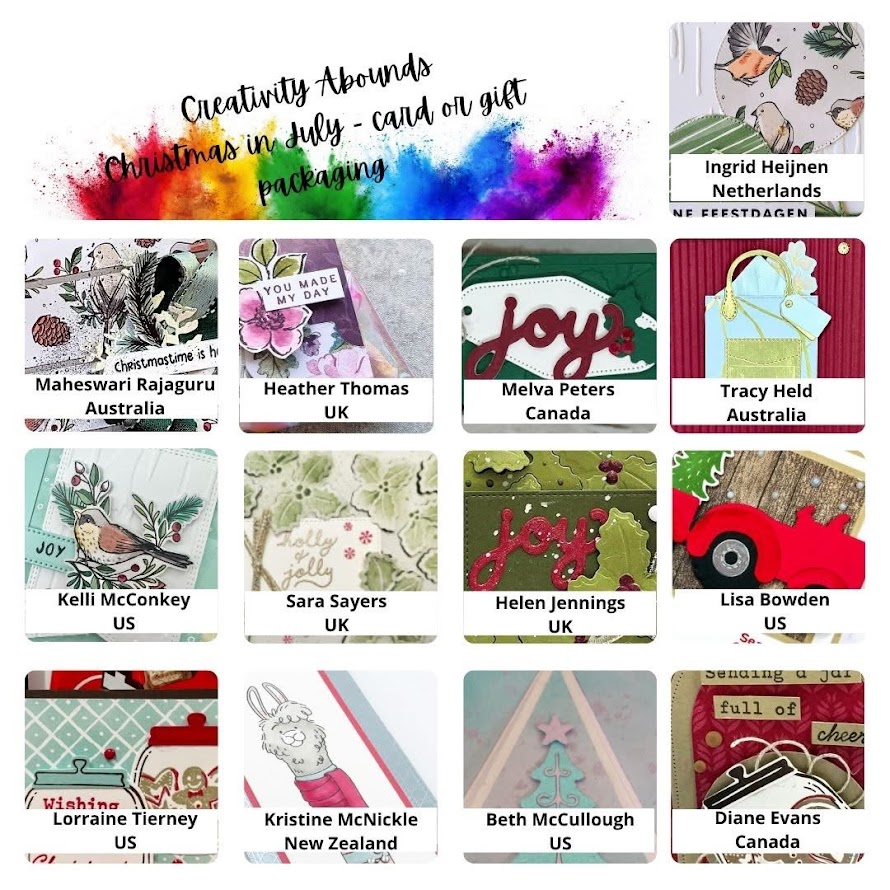
It’s time for the July Creativity Abounds Blog Hop! We are a group of Stampin’ Up! Demonstrators from all around the world who are here to share our creative ideas with you. We hope to inspire you this month with tons of different CHRISTMAS IN JULY projects! You may be starting here, or you may have come from someone else’s blog. Either way, there is a list at the end of this post to help you “hop” to all the different blogs and get many amazing ideas. We all have our countries listed, so if you are looking for a demonstrator in your country, we would love to help you with your Stampin’ Up! shopping or if you would like to join our Stampin’ Up! teams!
This month’s theme is CHRISTMAS IN JULY projects, and I’m really excited about the HUGE tutorial that you can buy as an instant download in my Made to Create store! I know you’re going to love it. Those of you who have made a $35+ purchase (before tax & shipping) through my Stampin’ Up! website in the month of June will also receive a copy of this awesome tutorial for FREE!
For today’s blog post, I made a darling Christmas card that you are going to LOVE!! It’s so festive!
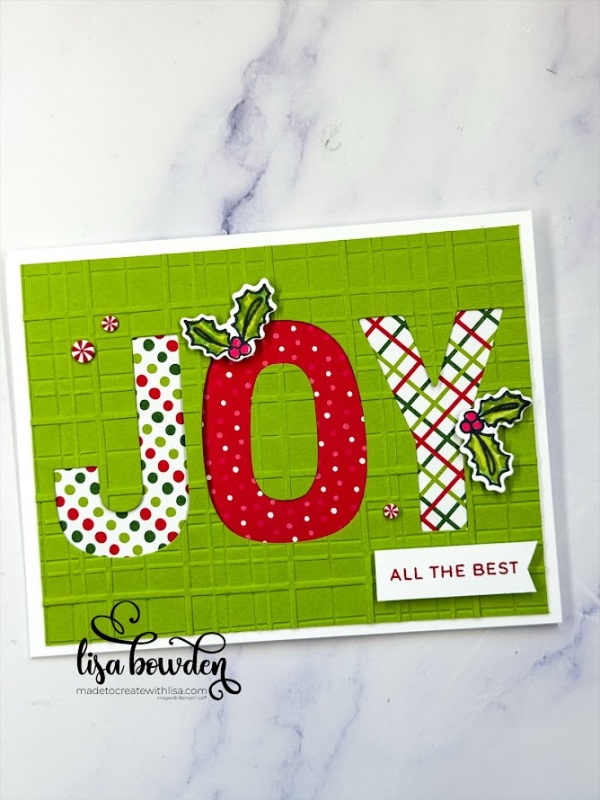
To make the card base, I started out with a 5-1/2″ x 8-1/2″ piece of Basic White cardstock, folded in half. PLEASE CLICK HERE to watch exactly how to fold this card base and put the card together.
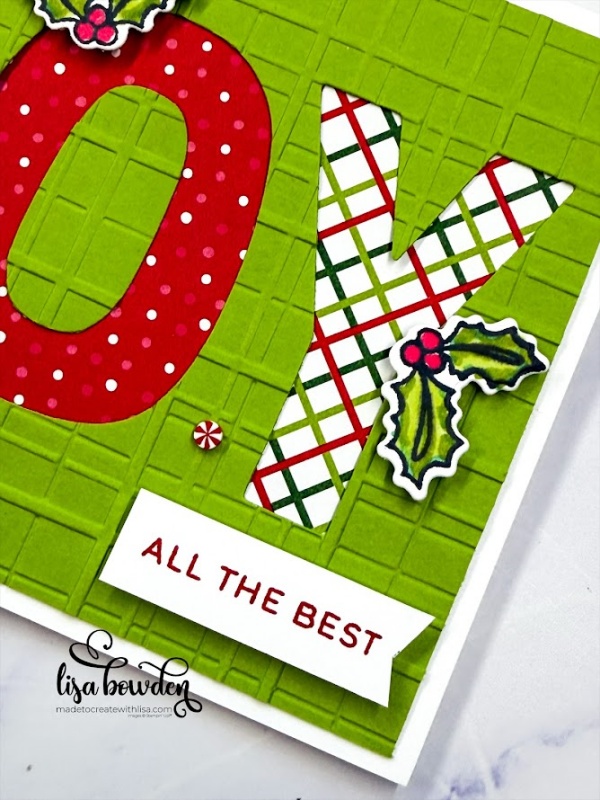
Next, I layered on a piece of Granny Apple Green cardstock, which I put through the Perfectly Plaid Embossing Folder. It’s such a GREAT folder, giving the card so much texture! Before adding it to my card base, I pulled out my Party Alphabet dies, and die cut out the word JOY. Doesn’t it look COOL?!?! I love this!!! And, by the way, I have my leftover letters that I can use on another project!
If you watch the video, you can see that I cut out 3 different pieces of Designer Series Paper (DSP) to layer behind the letters. Each of these pieces of DSP measures 1-3/4″ x 2-3/4″. I used various prints from the Take a Bow DSP, which has GREAT prints to choose from!
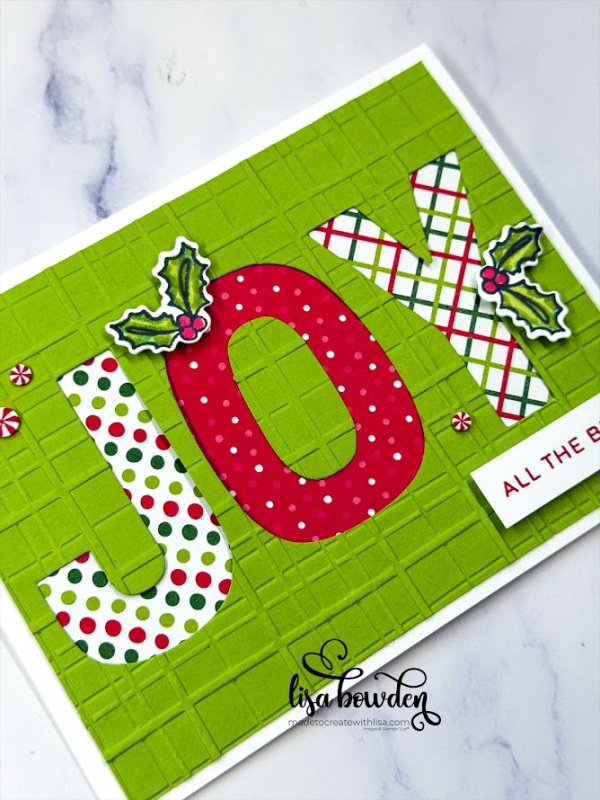
After I added the DSP and attached it to the card base, I worked on some stamping. I stamped the holly images from the Jolly Holly stamp set, stamping in Black Memento ink and coloring in using my Stampin’ Blends markers. These markers are the best! I used Granny Apple Green, Real Red, and some accents of Shaded Spruce. I die cut these out with the matching dies, and then added these pieces onto the card front with Stampin’ Dimensionals.
The little sentiment was stamped onto a scratch piece of Basic White cardstock, using Real Red ink, and bannered using my Paper Snips. And finally, I sprinkled on some of my most FAVORITE gems for Christmas…the cutest little peppermint gems you ever did see!! You’ve GOT to grab some of these before the season even starts, just to make sure you have them before they go out of stock!

I hope you absolutely love this adorable project. I was resistant to make a Christmas card, but after making this, I’m actually getting in the festive mood! LOL!!
I would love for you to grab July’s Creativity Abounds Tutorial Pack! Click here to purchase, in my Made to Create store, and it’s an instant download FULL of 13 different CHRISTMAS IN JULY ideas that you’re going to love. Here is the Sneak Peek for the projects that are featured in July’s Creativity Abounds Tutorial:
Have fun hopping to everyone else’s blogs! I hope you gain some inspiration that you can add into your everyday crafting! Please let me know if you have any questions.
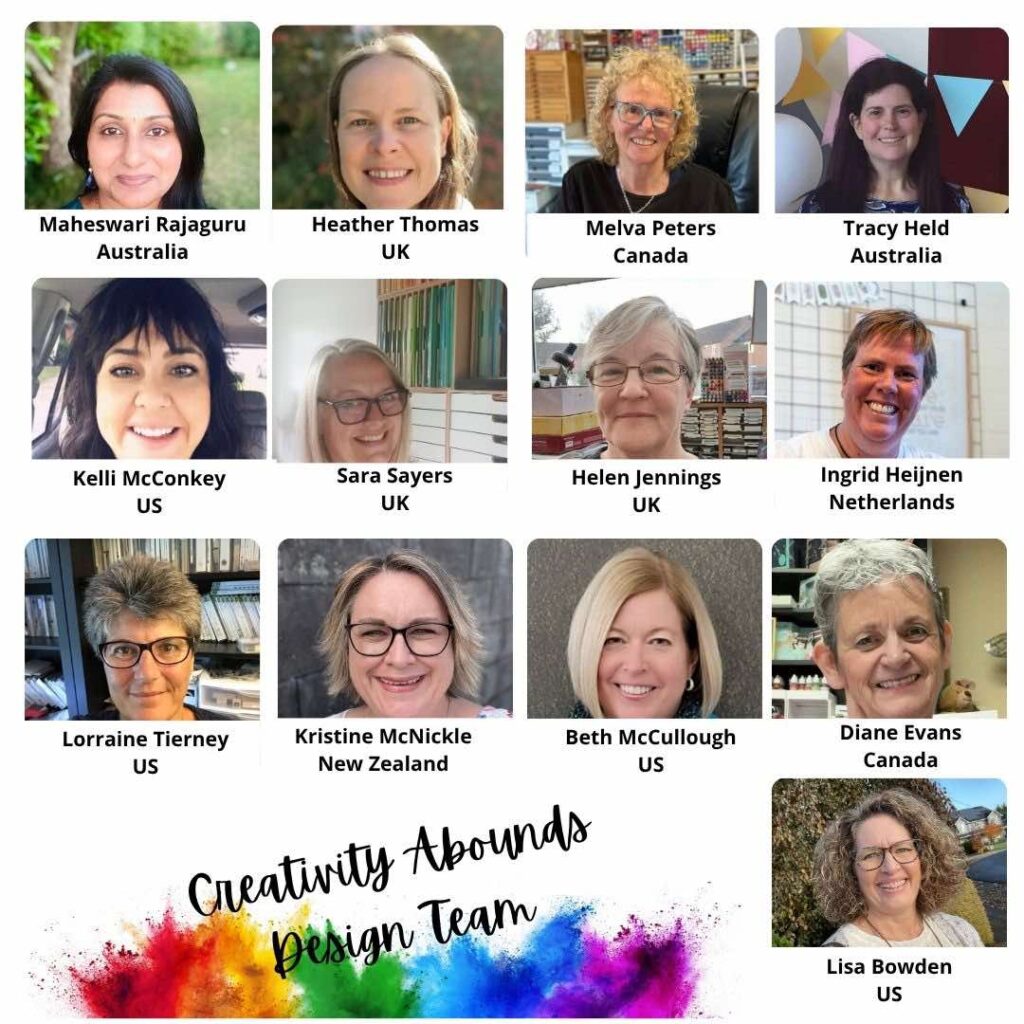
Here is our amazing Creativity Abounds Design Team:
![Jolly Holly Bundle (English) [ 166120 ]](https://assets1.tamsnetwork.com/images/EC042017NF/166120s.jpg "Jolly Holly Bundle (English) [ 166120 ]")
![Party Alphabet Dies [ 165263 ]](https://assets1.tamsnetwork.com/images/EC042017NF/165263s.jpg "Party Alphabet Dies [ 165263 ]")
![Take A Bow 6" X 6" (15.2 X 15.2 Cm) Designer Series Paper [ 164309 ]](https://assets1.tamsnetwork.com/images/EC042017NF/164309s.jpg "Take A Bow 6\" X 6\" (15.2 X 15.2 Cm) Designer Series Paper [ 164309 ]")
![Forever Plaid 3 D Embossing Folder [ 164049 ]](https://assets1.tamsnetwork.com/images/EC042017NF/164049s.jpg "Forever Plaid 3 D Embossing Folder [ 164049 ]")
![Granny Apple Green 8-1/2" X 11" Cardstock [ 146990 ]](https://assets1.tamsnetwork.com/images/EC042017NF/146990s.jpg "Granny Apple Green 8-1/2\" X 11\" Cardstock [ 146990 ]")
![Basic White 8 1/2" X 11" Cardstock [ 166780 ]](https://assets1.tamsnetwork.com/images/EC042017NF/166780s.jpg "Basic White 8 1/2\" X 11\" Cardstock [ 166780 ]")
![Real Red Classic Stampin' Pad [ 147084 ]](https://assets1.tamsnetwork.com/images/EC042017NF/147084s.jpg "Real Red Classic Stampin' Pad [ 147084 ]")
![Real Red & White Adhesive Backed Peppermints [ 164050 ]](https://assets1.tamsnetwork.com/images/EC042017NF/164050s.jpg "Real Red & White Adhesive Backed Peppermints [ 164050 ]")
![Granny Apple Green Stampin' Blends Combo Pack [ 154885 ]](https://assets1.tamsnetwork.com/images/EC042017NF/154885s.jpg "Granny Apple Green Stampin' Blends Combo Pack [ 154885 ]")
![Real Red Stampin' Blends Combo Pack [ 154899 ]](https://assets1.tamsnetwork.com/images/EC042017NF/154899s.jpg "Real Red Stampin' Blends Combo Pack [ 154899 ]")

What a great use of the new Party Alphabet Letters Lisa! Great project.
Thanks Kelli!! Aren’t these dies SO much fun?! I love them!
Such a fun card! Made me JOYful!