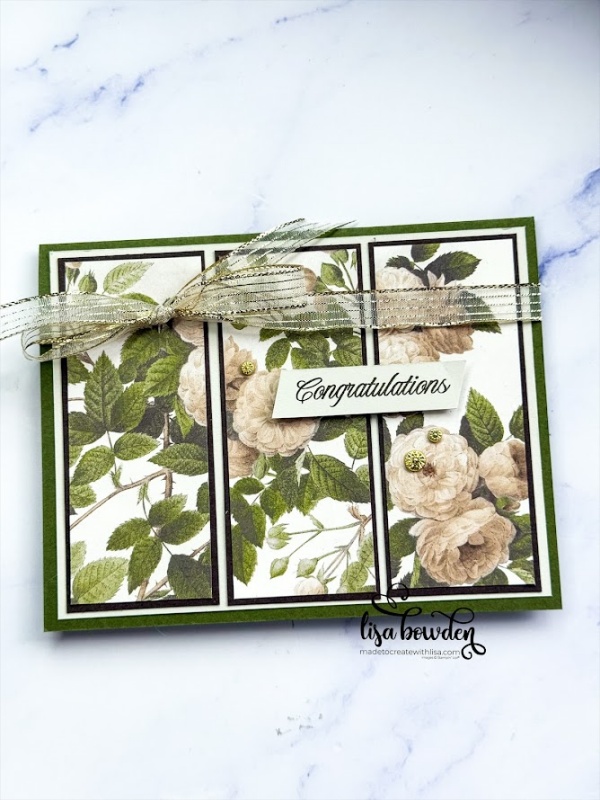
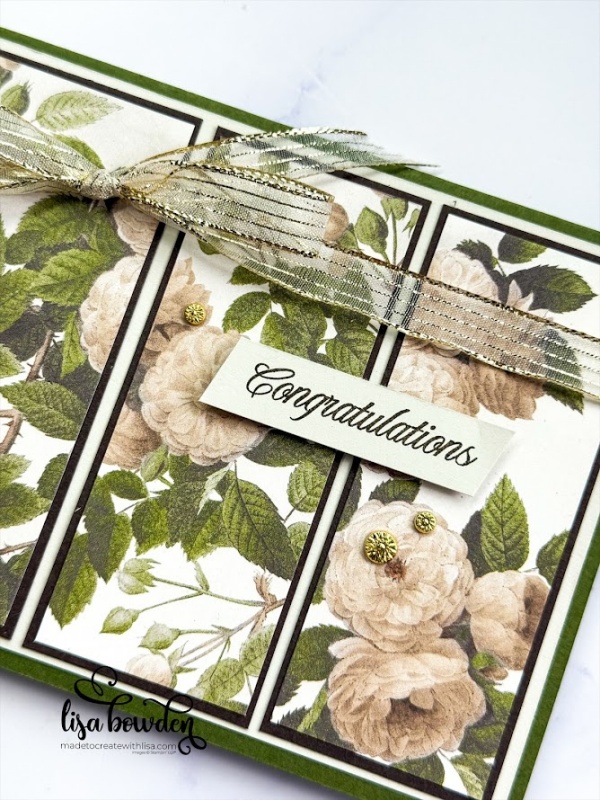
If you have a gorgeous piece of printed paper, it’s fun to make a “window pane” style of card. This means that you take a piece of paper, and slice it into 3 even strips with the print continuing over onto each strip. It’s like you’re looking through a window, with the panes separating the scene.
The Beautiful Gallery Designer Series Paper (DSP) by Stampin’ Up! has some really pretty prints in it that are PERFECT for this style of card. Really, just pick ANY type of printed “scene,” and it will work beautifully for this style of card layout.
PLEASE CLICK HERE to watch my dog, Taffy, make this gorgeous card! She did an amazing job!!

We started with an 8-1/2″ x 5-1/2″ piece of Mossy Meadow cardstock, folded in half, for the card base. Layered on top of that is a piece of Basic Beige cardstock, measuring 4″ x 5-1/4″. Then, finally, the 3 panels are layered on the top.
The DSP pieces are each 1-1/2″ x 3-3/4″, and they are layered onto Early Espresso strips that measure 1-5/8″ x 3-7/8″.

Wrapped around the card is some of the beautiful Gold Striped Mesh Ribbon, and the shiny Flower Accents gems are PERFECT for this card.

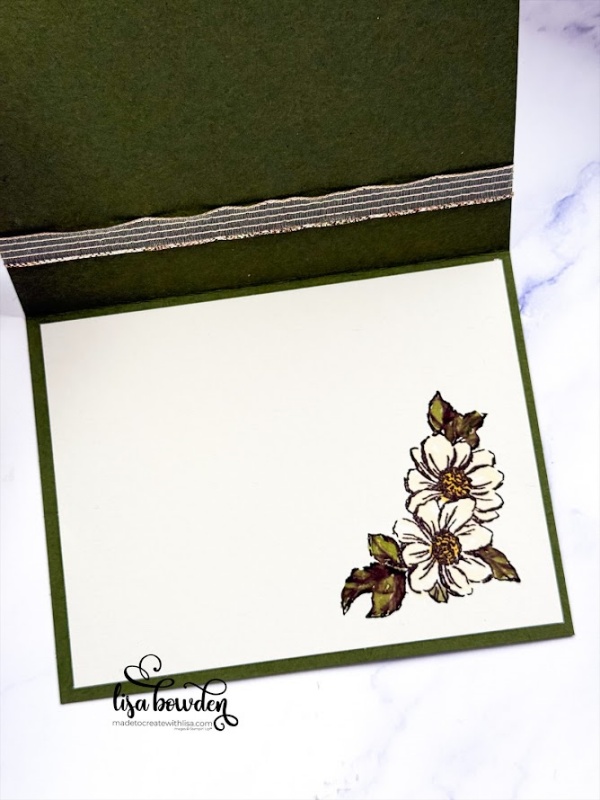
Stamped onto the inside of the card is one of the flowers from the stamp set, using Early Espresso ink, and colored in with Mossy Meadow, Darling Duckling, and Ivory Stampin’ Blends markers. And finally, the sentiment is from the Perfectly Pears stamp set, because the Gallery Blooms set doesn’t have any sentiments included. This sentiment was stamped onto a tiny 1/2″ wide scrap of Basic Beige cardstock, and trimmed on the edges at a slant.
PLEASE CLICK HERE to see another card made using this same layout! It’s so versatile, and perfect for so many beautiful papers.
Product List![Gallery Blooms Photopolymer Stamp Set [ 165211 ] Gallery Blooms Photopolymer Stamp Set [ 165211 ]](https://assets1.tamsnetwork.com/images/EC042017NF/165211s.jpg)
![Perfectly Pears Photopolymer Stamp Set (English) [ 166147 ] Perfectly Pears Photopolymer Stamp Set (English) [ 166147 ]](https://assets1.tamsnetwork.com/images/EC042017NF/166147s.jpg)
![Beautiful Gallery 6" X 6" (15.2 X 15.2 Cm) Designer Series Paper [ 165196 ] Beautiful Gallery 6" X 6" (15.2 X 15.2 Cm) Designer Series Paper [ 165196 ]](https://assets1.tamsnetwork.com/images/EC042017NF/165196s.jpg)
![Mossy Meadow 8-1/2" X 11" Cardstock [ 133676 ] Mossy Meadow 8-1/2" X 11" Cardstock [ 133676 ]](https://assets1.tamsnetwork.com/images/EC042017NF/133676s.jpg)
![Early Espresso 8-1/2" X 11" Cardstock [ 119686 ] Early Espresso 8-1/2" X 11" Cardstock [ 119686 ]](https://assets1.tamsnetwork.com/images/EC042017NF/119686s.jpg)
![Basic Beige 8 1/2" X 11" Cardstock [ 164511 ] Basic Beige 8 1/2" X 11" Cardstock [ 164511 ]](https://assets1.tamsnetwork.com/images/EC042017NF/164511s.jpg)
![Early Espresso Classic Stampin' Pad [ 147114 ] Early Espresso Classic Stampin' Pad [ 147114 ]](https://assets1.tamsnetwork.com/images/EC042017NF/147114s.jpg)
![Mossy Meadow Stampin' Blends Combo Pack [ 154890 ] Mossy Meadow Stampin' Blends Combo Pack [ 154890 ]](https://assets1.tamsnetwork.com/images/EC042017NF/154890s.jpg)
![Bronze & Ivory Stampin' Blends Combo Pack [ 154922 ] Bronze & Ivory Stampin' Blends Combo Pack [ 154922 ]](https://assets1.tamsnetwork.com/images/EC042017NF/154922s.jpg)
![Darling Duckling Stampin’ Blends Combo Pack [ 165288 ] Darling Duckling Stampin’ Blends Combo Pack [ 165288 ]](https://assets1.tamsnetwork.com/images/EC042017NF/165288s.jpg)
![Gold Striped 3/8" (1 Cm) Mesh Ribbon [ 165599 ] Gold Striped 3/8" (1 Cm) Mesh Ribbon [ 165599 ]](https://assets1.tamsnetwork.com/images/EC042017NF/165599s.jpg)
![Flower Accents [ 165171 ] Flower Accents [ 165171 ]](https://assets1.tamsnetwork.com/images/EC042017NF/165171s.jpg)

Beautiful (as usual with Taffy) Waff waff !!!!
And many thanks to you …
HAHAHA!!! Taffy said, “Thank you very much!”
looking forward to future post.
Thanks for being here, Valerie!